Entryphone Connect User Guide

Table of Contents

User Registration

To start using the Entryphone Connect App, you need to register an account.

  1. On your smart-phone open the Entryphone Connect app
  2. Tap the Account login icon.
  3. On the Login page, tap Register at the bottom of the page.
  4. Please rovide the following:
    • Email: Please specify a valid e-mail address that is not already associated with an Entryphone Connect account.
    • Password: Your chosen password needs to be 6 or more characters containing both numbers and letters.
    • Confirm password: Re-type to confirm.
  5. Tap Next.

Logging In

To log in to an existing Entryphone Connect account:

  1. Tap the Entryphone Connect app to open it.
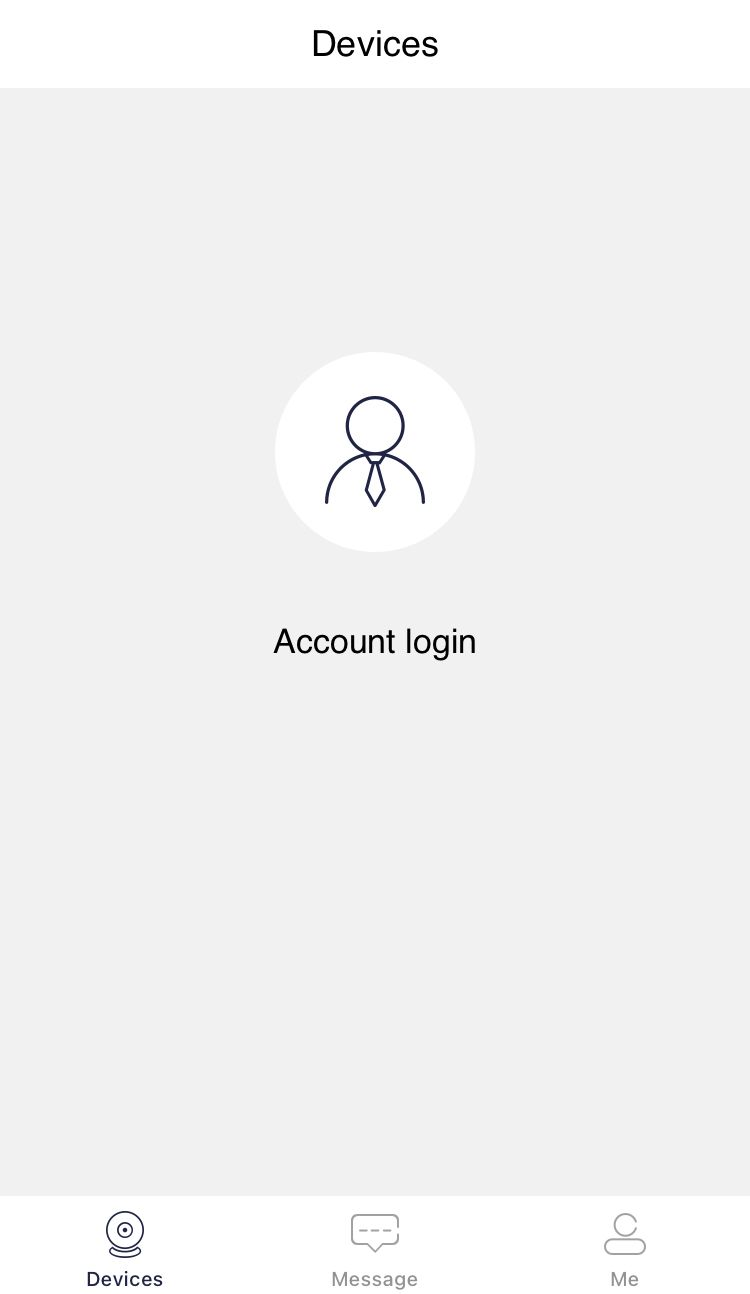
  2. Tap the account login icon.
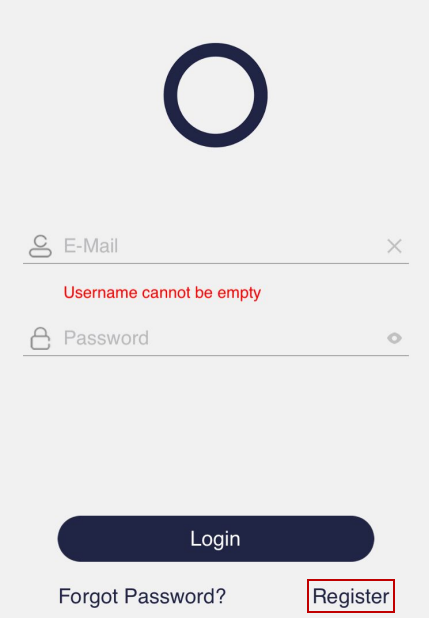
  3. Please provide:
    a. Email: Enter the email address that you used to register with Entryphone Connect.
    b. Password: Enter your pass.
  4. Click Login.
    You will now be loggid in.

Reset Password

To reset your password

  1. Access the login page.
  2. Tap Forgot Password.
  3. Enter the email address registered with the application and tap Next.
    A verification code will be sent to your e-mail address.
  4. Enter the verification code on the password reset page.
  5. Set a new password and confirm.
    The password is reset.

Your Devices

The devices section lets you view a list of all the devices currently connected to your account. To view the device list:

  1. Tap Devices on the bottom menu. The devices list displays.

Accessing a Device

On the Devices page, tap the image of the device you want to view. It may take a few seconds to connect but you will then have a real-time view of the door and, if required you can operate the door release(s).

  1. On Devices page, tap the device you want to access. The device page opens where you can live monitor your door.

Here you also have a selection of function switches to remotely manage your device.

Parameter Description
Mute mic Tap Mute mic icon to mute your microphone, preventing others from hearing you. If you want to unmute, simply tap the muted icon again. Tap Mute icon to prevent any audio from playing through the device. If you want to unmute, simply tap this icon again.
Unlock Tap unlock icon to unlock your door through Connect Entryphone remotely. This feature provides added convenience and security by allowing you to grant access to visitors even when you are not at home.
Mute sound
Tap Mute sound icon to prevent any audio from playing through the device. If you want to unmute, simply tap this icon again.
Photo
Tap this icon to capture a picture.
Video
Tap this icon to record a video.
Bandwidth
Tap this icon to decrease data bandwidth but also affects picture quality, so it's crucial to weigh your priorities when deciding between bandwidth and picture quality.
Resolution
Tap this icon to adjust the resolution of the picture for optimal viewing.
Aspect ratio
Tap this icon to change the aspect ratio from widescreen to square, ensuring compatibility with various screens.

Answering an incoming Call

To answer an incoming call:

  1. Accept the incoming call as you would any normal call.
  2. After accepting an incoming call, you have the option to conduct various actions throughout the call.
Parameter Description
Mute mic
Tap Mute mic icon to mute your microphone, preventing your visitor hearing you. To unmute, tap the muted icon again.
Unlock
Tap unlock icon to unlock your door.
Unlock Main gate
Tap this icon to unlock your your gate or second door.

Viewing Calls History

To view the calls you have received from all your devices tap the History icon at the bottom of the screen. Listed in date order (the latest at the top) each entry shows the time of the call, shows a thumbnail image of the caller and which device called. Tapping the thumbnail brings up a larger image of the caller.

  1. Tap History on the bottom menu.

Each call is listed with:

  • The device name - i.e. where the call was from.
  • Message status: Unread or Read
  • Timestamp

Filtering Call History

At the top of the call history screen you can filter the call history based on device, event and date.

In the history section, set the following filters as required:
  • Device: Lets you filter call history based where you were called from.
  • Day: Lets you filter calls received on a particular day.

Removing Calls History

You have the option to remove unwanted calls from the history.

  1. In Message section, tap at the top of the screen.
  2. Use the check boxes to select calls you want to remove from the call history.
  3. Tap at the bottom of the screen.

You also have the option to remove all call records at once:

  1. Tap .

Viewing Your Album

If during a call you have either recorded a still image or video of a caller this will be saved in your picture Album. To access album:

  1. Tap Me at the bottom menu. The profile page displays.
  2. In Profile page, tap Album.
    The Album page displays each image or video as a thumbnail. To view or play tap the thumbnail. At the top of the view/play page you can opt to delete the file of use the copy icon to forward it via e-mail, message, WhatsApp etc.

Sharing Your Devices

You can extend access to other users, enabling them to receive calls on their smart-phones whenever a device is called. Firstly, they must download the Entryphone Connect App and create their own account.

  1. Tap Devices on the bottom menu.
    Your device list page displays.
  2. On the top right of a device , tap ....
    The screen will dim and you will see a share icon To invite someone to share access, enter the email associated with their registered account and tap the search icon.

Message Reminder Settings

You can choose how to receive notifications about incoming calls in the Call Reminder settings. To do so:

  1. Tap Me at the bottom menu. The profile page displays.
  2. In Profile page, tap Message Reminder Settings.
    The Message Reminder Settings page displays.
    • Do not disturb: If this option is enabled, call or alarm notifications won't be received by the EntryPhone Connect application. By default, it is disabled.
    • Sound: If this option is enabled, the sound will play with incoming calls.
    • Vibration: If this option is enabled, the phone will vibrate with incoming calls. By default, it is disabled.

Modifying Device Name:

The procedure for modifying the name of a device is as follows:

  1. In Devices page, tap for the device. A dropdown displays.
  2. From the dropdown, tap Settings.
    The Settings page displays.
  3. In Settings page, tap the Device name.
    The Device Name dialog displays.
  4. Modify the device name as required and tap Confirm.
    The device name gets modified.

Viewing Device Details

To view device details:

  1. In Devices page, tap for the device. A dropdown displays.
  2. From the dropdown, tap Settings.
    The Settings page displays.
  3. Tap Device Details.
    The device details page displays where you can view device’s UID and Model number.

Push Settings

Push settings enable users to set notifications for incoming ring calls on the application when a door bell is pressed. To do so:

  1. In Devices page, tap for the device. A dropdown displays.
  2. From the dropdown, tap Settings.
    The Settings page displays. The Push Settings page displays.
  3. In Push Settings page, set the following:
    a. Ring Alert: Enable this option to receive an incoming ring call on the application when a door bell is pressed.

Biometric Unlock

Biometric unlock prompts users to use their fingerprints before opening the lock. This feature adds an extra layer of security to your device by requiring your unique biometric data to unlock it. To enable biometric unlock:

  1. In Devices page, tap for the device. A dropdown displays.
  2. From the dropdown, tap Settings.
    The Settings page displays.
  3. In Device settings page, tap Advanced Settings.
    The Advanced Settings page displays.
  4. In Advanced Settings page, tap Unlock Settings.
    The Unlock settings page displays.
  5. Enable Biometric unlock.
    The system prompts you to verify your phone’s touch ID to open the lock.

Unlock Shortcuts

Unlock shortcut lets you create shortcuts in the Apple's shortcuts list. You can use Unlock shortcut to quickly lock or unlock the doors as required. This feature can help you save time and streamline your workflow. To create unlock shortcuts:

  1. In Devices page, tap for the device. A dropdown displays.
  2. From the dropdown, tap Settings.
    The Settings page displays.
  3. In Device settings page, tap Advanced Settings.
    The Advanced Settings page displays.
  4. In Advanced Settings page, tap Unlock Settings.
    The Unlock settings page displays.
  5. Tap Unlock shortcuts.
  6. Specify the name of the shortcut and check other unlock options as desired.
  7. Tap Confirm.
    The shortcut is created.

Thumbnail Settings

Thumbnail settings let you choose a picture from your phone’s gallery to be used as a device thumbnail, making it easier to identify. To set a thumbnail:

  1. In Devices page, tap for the device. A dropdown displays.
  2. From the dropdown, tap Settings.
    The Settings page displays.
  3. In Device settings page, tap Advanced Settings.
    The Advanced Settings page displays.
  4. In Advanced Settings page, tap Thumbnail Settings.
    The Thumbnail Settings page displays.
  5. In Thumbnail Settings page, tap Browse.
    Browse and select the desired photo from your phone’s gallery.
    The thumbnail is selected.

Modify Password

The procedure for modifying your account’s password is as follows:

  1. Tap Me at the bottom menu. The profile page displays.
  2. Tap .
    The Account page displays.
  3. Tap Modify password.
    The Modify password page displays.
  4. In Modify password page, specify the following:
    a. Your current password
    b. New password
    c. Confirm new password
  5. Tap Confirm.
    Your password is modified.

Deleting Account

To delete an account:

  1. Tap Me at the bottom menu. The profile page displays.
  2. Tap .
    The Account page displays.
  3. Tap Delete account permanently.
    The confirmation page displays.
  4. Tap Delete.
    The account is deleted.